
Fall Cookbook

Ahh, fall. It’s the season of crisp air, falling leaves, haunted hay rides, pumpkin picking, and jack-o-lantern carving. As the daylight hours wane and the nights get colder, we gather around cozy fires, wrap ourselves in warm blankets, and indulge in comforting treats like pumpkin-spiced pastries and hot apple cider. Fall is a season that invites us to savor the simple pleasures of life and appreciate the beauty of nature’s transformation.
Whether you need a quick and easy dish to impress your cuffing season companion with or a more elaborate meal to bring to Thanksgiving dinner, then you’ve come to the right place. We’ve put together a collection of six of our favorite fall recipes, ranging from drinks and side dishes to satisfying dinners and delectable desserts.
Embrace the flavors of this captivating season and let our fall recipe collection be your guide to creating memorable culinary moments throughout the autumn.
All recipes are by Forget Me Not Food.
Orchard-to-Mug Spiced Apple Cider

There’s truly no better way to celebrate one of the most beautiful times of the year than cozying up with a good book and a comfy blanket next to an open window with a warm mug of apple cider in hand.
Crafting the perfect batch of cider is as simple as heading to your local apple orchard and handpicking some crisp apples and then letting them simmer on your stove for a few hours.
Picking the fruit yourself not only allows it to be of the highest quality, but it also serves as an opportunity for you to manipulate the flavor of the cider to your liking. Local apple orchards typically offer a wide variety of apples to choose from, but you can narrow down which varieties to pick depending on whether you want to make a sweet or tart cider.
Gala, Honeycrisp, Fuji, and Red Delicious apples are typically used for a sweeter cider, while McIntosh, Pink Lady, and Jonagold apples are used to obtain a more tart or acidic flavor. We like our cider sweet, so we recommend using a combination of Gala and Honeycrisp apples. Using only one variety, however, works just as well.
One of the best parts of making homemade apple cider is that you can use the apples that are leftover after straining the cider to make applesauce. It’s as easy as mashing the apples with a potato masher to obtain a chunkier sauce or popping them into a food processor for a smoother texture.
Ingredients:
10 large apples, sliced (we recommend 5 Gala and 5 Honeycrisp)
Note: If you’re using small-to-medium-sized apples, then use a total of 10-15 apples.
16 cups of water (or enough to cover the apples in your stockpot)
3/4 cup sugar
1 tbsp ground cinnamon
1 tbsp allspice
6 cinnamon sticks
Directions:
Wash and slice apples.
In a large stockpot, combine sliced apples, water, sugar, ground cinnamon, allspice, and cinnamon sticks and stir until evenly mixed.
Bring to a boil over medium-high heat, then let simmer, uncovered, for one hour.
Cover the stockpot and let simmer on low heat for two hours.
Strain the mixture into your desired container and refrigerate for one day.
Note: We’ve found that leaving the cider in the fridge for at least one day before enjoying it significantly enhances its flavor. If you want to serve the cider warm, then we recommend refrigerating it for one day and then heating your desired amount on the stove. The cider will stay fresh in the fridge for up to one week.
Pumpkin Gnudi with Vanilla Bean Brown Butter

This indulgent dish is our take on a similar dish from our favorite restaurant when we were in college (The Porch at Schenley in Pittsburgh, PA). The Porch is the kind of place where everything on the menu is good. So good, in fact, that you could even blindfold yourself, order whatever item on the menu you randomly point to, and not be disappointed.
The Porch is also alluring because of its cozy environment, as it’s tucked away under Schenley Plaza’s sycamore trees and offers a perfect view of Pitt’s towering Cathedral of Learning directly across the street. When you step into the restaurant, you’re greeted by a variety of heavenly scents and are immediately enveloped in the cozy warmth that emanates from the wood-fired pizza oven.
While famous for its crispy, thin-crust pizza, The Porch also specializes in crafting more elaborate seasonal dishes. One of our all-time favorites was the pumpkin gnudi (which The Porch no longer offers).
“Gnudi,” Italian for “naked,” is often thought of as cheese ravioli without the surrounding pasta. They’re essentially delicate dumplings that are similar to gnocchi, but are made with ricotta cheese instead of potatoes. As a result, the end product is often much softer than its better-known yet chewier counterpart.
This particular gnudi is made with pumpkin, drenched in vanilla bean brown butter, and topped with kale chips, pickled cranberries, and toasted hazelnuts. It’s an involved, multi-step recipe (due to its several garnishments), but it’s well worth the effort.
For the Kale Chips:
Ingredients:
1 bunch of kale, washed and dried well
2 tsp olive oil
a pinch of salt
Directions:
De-stem, wash, and thoroughly dry kale.
On a baking sheet lined with parchment paper, break kale into smaller, chip-sized pieces.
Lightly drizzle olive oil over kale chips and sprinkle a pinch of salt on top.
Bake for 10 minutes at 300°F, then rotate the baking sheet (so that the front is now in the back of the oven), flip any crispy pieces over, and bake for another 10 minutes, watching carefully to prevent over-browning.
For the Pickled Cranberries:
Ingredients:
1 bag of fresh cranberries
3/4 cup apple cider vinegar
2/3 cup sugar
1/3 cup water
1 cinnamon stick
1/4 tsp whole cloves
1/4 tsp peppercorns
1” piece of fresh ginger
Directions:
Place cloves, peppercorns, and ginger into a spice bag and set aside.
Bring apple cider vinegar, sugar, and water to a boil over medium-high heat in a sauce pan and stir until the sugar is dissolved.
Add the cinnamon stick and spice bag to the pan and let simmer for one minute.
Lightly rinse the cranberries under water and add to the pan. Bring to a boil and cook until the cranberries begin to pop.
Remove the pan from the heat and let it sit for 5 minutes, then remove the cinnamon stick and spice bag.
For the Toasted Hazelnuts:
Ingredients:
desired amount of hazelnuts
Directions:
Spread your desired amount of hazelnuts onto a baking sheet lined with parchment paper and roast at 350°F for 10 minutes, or until nuts appear slightly darker and smell toasty.
For the Gnudi:
Ingredients:
1 cup whole milk ricotta cheese
1 cup freshly grated parmesan cheese
1/2 cup pumpkin puree
3 eggs
1/2 cup all-purpose flour (plus 1 cup for dusting)
1/2 tsp salt
1/2 tsp cinnamon
1/4 tsp nutmeg
1/4 tsp ground ginger
Directions:
Bring a large pot half-filled with water to a boil.
In a large bowl, mix together ricotta, parmesan cheese, pumpkin puree, and eggs.
Mix in 1/2 cup flour, salt, cinnamon, nutmeg, and ginger until just combined.
Spread 1/2 cup flour onto a large plate or baking sheet lined with parchment paper. Using a measuring spoon, roll 1 tablespoon of gnudi dough into a ball, then gently roll in flour to coat the outside. Place the gnudi on a tray or baking sheet. Repeat until you’ve used the entire mixture, adding more flour as needed.
Note: If you’d prefer to have smaller-sized gnudi, then use a smaller measuring spoon (i.e. a teaspoon) to measure each piece.
Divide the gnudi into two halves and gently add one-half to the pot of boiling water. Remove each piece from the pot when it floats to the top. Repeat this step with the second-half of the gnudi.
For the Vanilla Bean Brown Butter Sauce:
Ingredients:
2 sticks salted butter
1/2 tsp vanilla extract (or the seeds from 1 vanilla bean, depending on your budget and taste preferences)
Directions:
Melt the butter in a saucepan over medium heat.
Mix in vanilla extract.
Note: Depending on your budget and taste preferences, you can substitute the seeds from one vanilla bean for the vanilla extract. This, while expensive, will significantly enhance the flavor and quality of the brown butter sauce.
Once melted, continuously stir the mixture and scrape the bottom of the pan with a wooden spatula as the butter foams and turns golden brown.
Continue stirring and scraping the bottom of the pan as the milk solids at the bottom start to brown and the liquid turns amber in color. When this happens, immediately remove the pan from heat and let cool to room temperature.
Thanksgiving Dinner-Stuffed Pumpkins

Stuffed pumpkins are something straight out of a dreamy Pinterest board. They’re cute, versatile, and easily transform ordinary dinners into whimsical experiences while keeping cleanup hassle-free.
They’re also a fun surprise for your dinner guests and are the perfect way to reinvigorate your Thanksgiving leftovers, giving you a fresh perspective on the traditional holiday feast. If you’re not a big Thanksgiving dinner fan, then you can stuff the pumpkins with soup or pasta, among many other things.
You don’t want to use large carving pumpkins for baking, however. Instead, grab a few pie pumpkins, which are smaller and tend to be slightly darker in color than carving pumpkins. When in doubt, look for pumpkins that would fit best on a dinner plate and have the capacity to hold whatever you want to put inside them.
Ingredients:
1 baking pumpkin
1 cup prepared stuffing
desired amount of sliced fresh turkey
1/2 cup cranberry sauce
1 cup mashed potatoes
1/2 cup shredded gruyere cheese
2 tbsp chopped fresh thyme
desired amount of gravy for topping
Directions:
Preheat oven to 375°F and line a baking sheet with parchment paper. Slice the top of the pumpkin off and remove all seeds and strings from the inside.
Place the pumpkin on the baking sheet and bake for 30 minutes.
Remove the pumpkin from the oven and place the stuffing inside as the bottom layer. Then, distribute the turkey on top of the stuffing.
Pour the cranberry sauce in an even layer on top of the turkey, then spread the mashed potatoes over the cranberry sauce.
Top everything with gruyere cheese and fresh thyme.
Bake the stuffed pumpkin for another 20 minutes, or until the flesh of the pumpkin feels tender when pierced with a fork.
Top with your desired amount of gravy and then enjoy!
Cast-Iron Cornbread with Honey Butter Crumble

There’s quite literally nothing more country than buttermilk cornbread cooked in a cast-iron skillet.
The age-old practice of cooking with cast-iron is not just a matter of tradition, but also of practicality and flavor. The skillet’s heat retention and even-distribution capabilities ensure that the cornbread bakes uniformly, resulting in a crispy, golden crust, while its high heat tolerance makes it perfect for achieving a consistent texture throughout.
The secret to the cast-iron skillet’s magic lies in its ability to create a naturally non-stick surface. Over time, with proper care and regular use, the skillet develops a seasoned surface that becomes more non-stick with each use. This means that you can use less oil or butter when initially greasing the skillet.
One of the most underrated parts of cooking with cast-iron is the unique flavor it imparts to the particular dish you’re cooking. The iron in the skillet subtly infuses the cornbread with a slight earthy flavor, which makes it stand out from cornbread baked in other types of pans. The skillet’s ability to reach high temperatures promotes caramelization, which adds sweetness to the crispy edges of the cornbread, thereby enhancing its overall taste and texture.
Aside from cast-iron’s flavor and texture benefits, cooking cornbread in a cast-iron skillet imparts a rustic and traditional look to the cornbread, adding a touch of down-home charm and nostalgia to your table. It’s truly the perfect fall side dish.
For the Honey Butter Crumble:
Ingredients:
1/3 cup cornmeal
1/4 cup bread flour
1/2 tsp salt
6 tbsp butter, melted
3 tbsp honey
Directions:
In a bowl, whisk together the cornmeal, bread flour, and salt.
In a separate bowl, whisk together the melted butter and honey.
Pour the honey/butter mixture into the flour mixture and mix evenly until combined. Set aside to place on top of the cornbread.
For the Cornbread:
Ingredients:
1 stick butter, softened
2/3 cup honey
2 eggs
1 cup (152 g) cornmeal
1 cup (120 g) bread flour
1 tsp baking powder
1/2 tsp baking soda
1 tsp salt
1 cup buttermilk
Directions:
Preheat oven to 350°F and grease an 8-10” cast-iron skillet with butter.
In a large bowl, beat the butter and honey for 3 minutes until fluffy.
In a separate bowl, whisk together the cornmeal, bread flour, baking powder, baking soda, and salt. Then, mix that into the honey/butter mixture until evenly incorporated.
Mix in buttermilk until just combined.
Pour the cornbread batter into the skillet, top with the honey butter crumble, and bake for 25-30 minutes until domed and golden brown on top.
Brown Butter Chocolate Graham Crackers
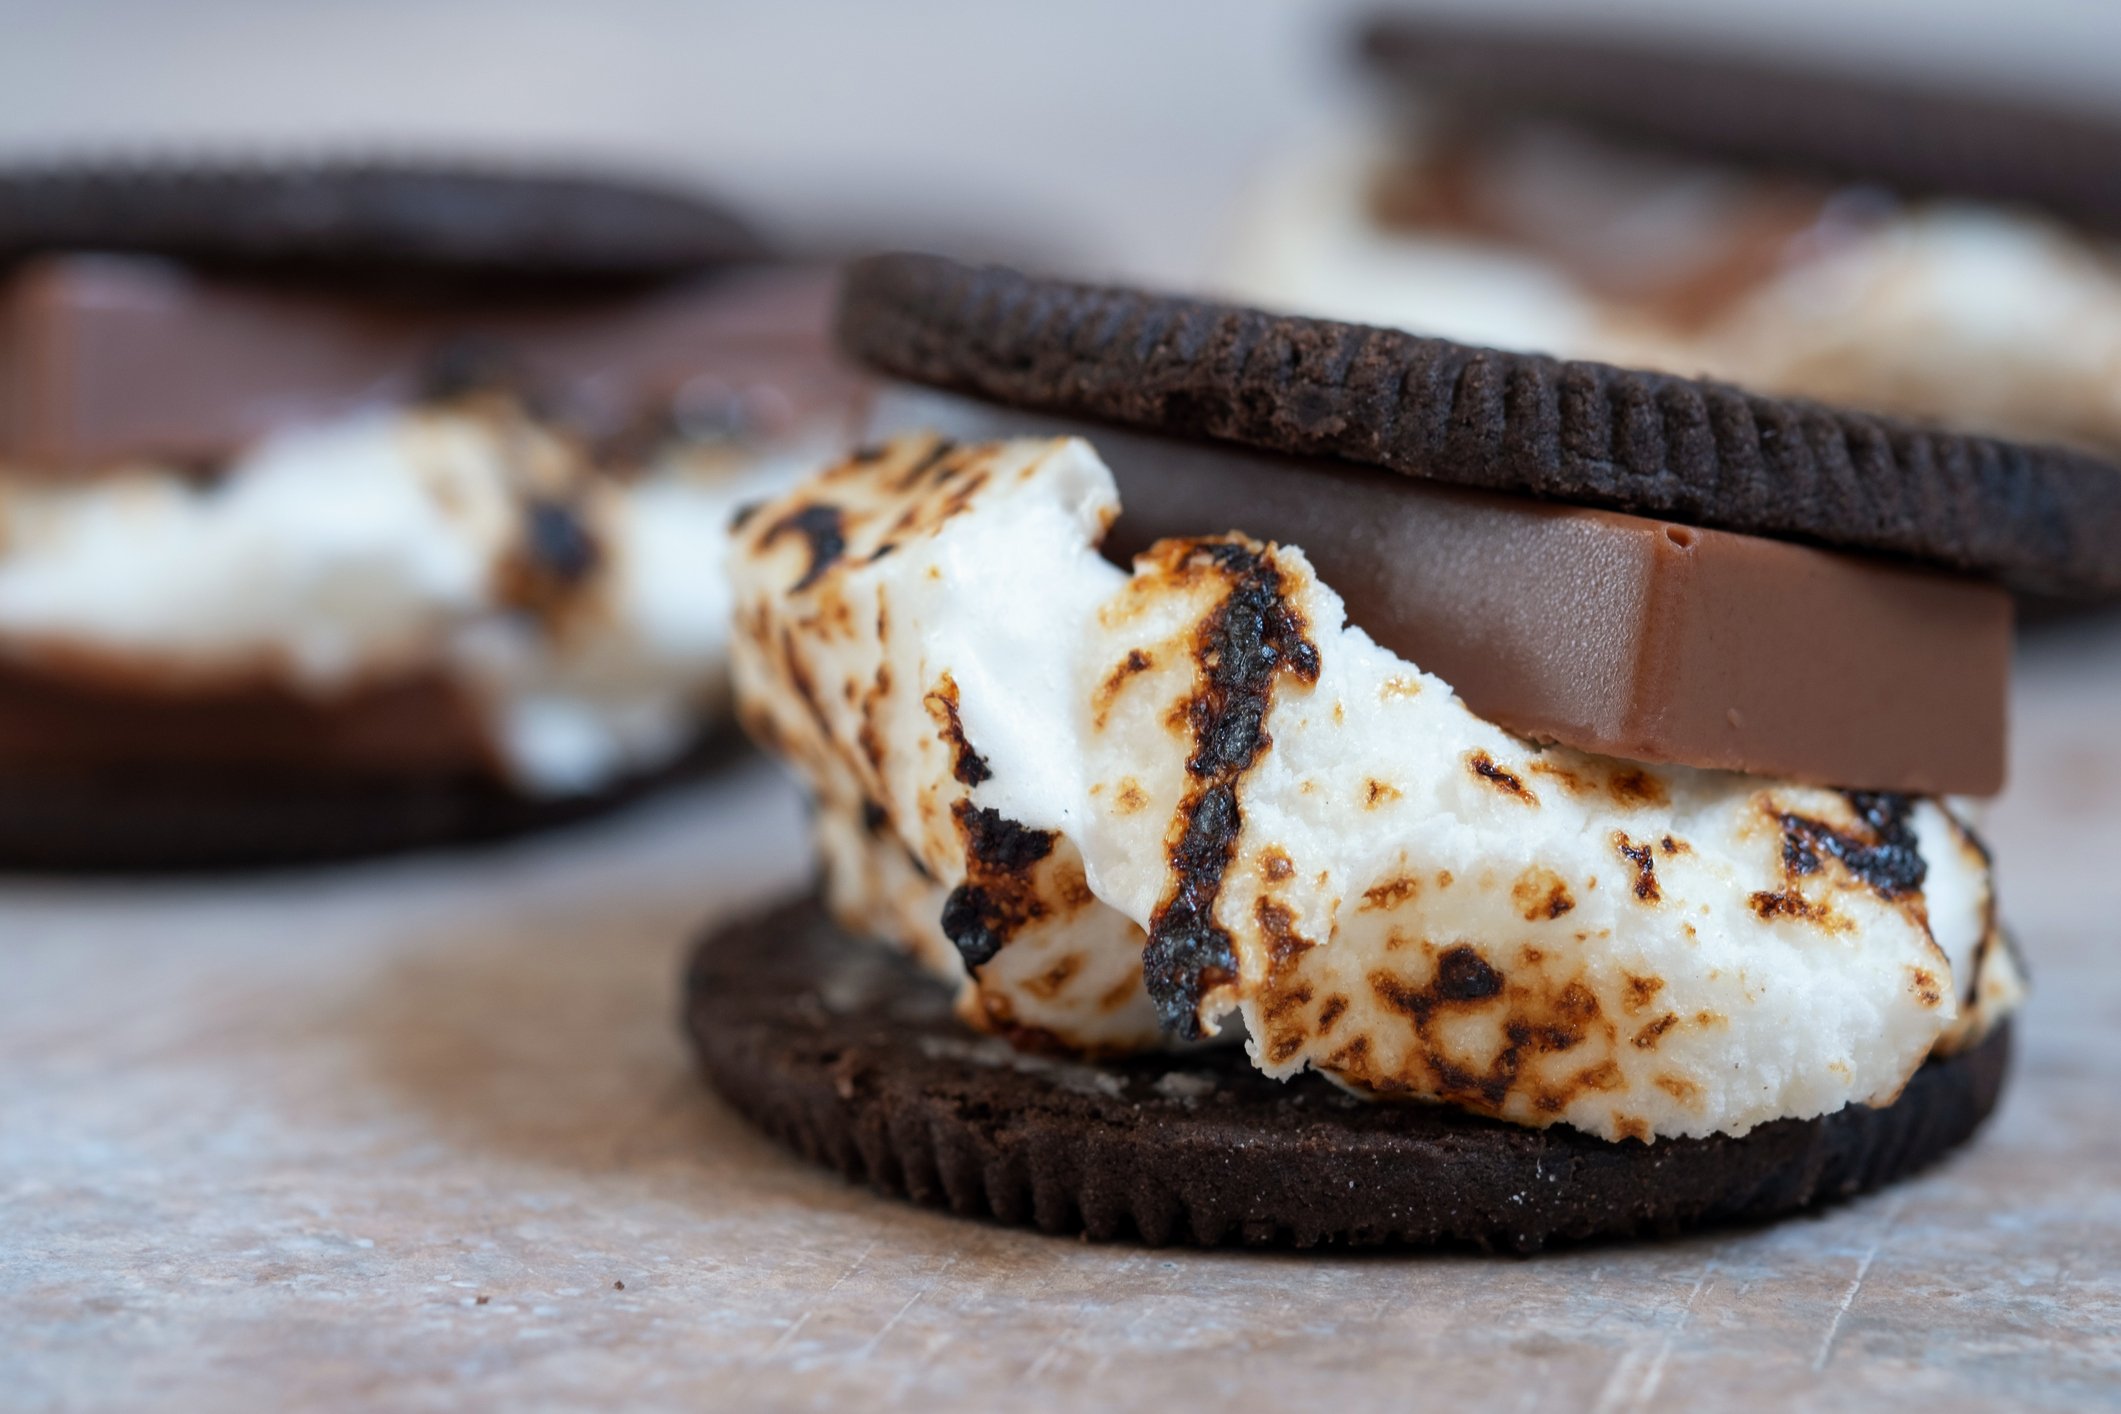
If you’re like us, then classic graham crackers just don’t do it for you. After all, who wants to eat the equivalent of a cinnamon-flavored piece of cardboard? Not us.
Enter: chocolate graham crackers. They have everything that traditional graham crackers lack, and they’re perfect for campfire s’mores, pie crusts, and even as a standalone snack. Since they can be challenging to find in grocery stores, we decided to formulate our own recipe so that we never have to worry about chasing down a box in stores. The recipe we devised results in graham crackers that taste like brownies while still maintaining a graham cracker consistency.
Ingredients:
8 tbsp unsalted butter, softened
1/4 cup (60 g) dark brown sugar
1/3 cup (75 g) white sugar
1 egg
2 tbsp honey
1 tbsp vanilla extract
1 cup (156 g) whole wheat flour
1 1/4 cups (150 g) all-purpose flour
1 tsp baking powder
1 tsp salt
Directions:
Melt 5 tablespoons of butter in a saucepan over medium heat. Once melted, continuously stir the mixture and scrape the bottom of the pan with a wooden spatula as the butter foams and turns golden brown. Continue stirring and scraping the bottom of the pan as the milk solids at the bottom start to brown and the liquid turns amber in color. When this happens, immediately remove the pan from heat and let cool to room temperature.
Pro Tip: The best way to level-up any recipe is by adding brown butter. The reactions that occur when butter is heated cause new flavor compounds to be formed, resulting in a caramel-like taste and slightly nutty scent that perfectly enriches even the most boring dish.
In a mixing bowl, cream together the dark brown sugar, white sugar, and remaining 3 tablespoons of butter using a handheld mixer for three minutes on medium-high speed.
Mix in egg until incorporated.
Note: You may need to use a silicone spatula to scrape the sides of the bowl to ensure even incorporation of the ingredients.
Mix in the cooled brown butter, honey, and vanilla extract.
In a separate bowl, whisk together the whole wheat flour, all-purpose flour, baking powder, and salt.
Mix together half of the flour mixture into the butter/sugar mixture.
Add the remaining half of the flour mixture and mix until fully incorporated.
Divide the dough in half, shape each half into a flat disk, and wrap each in plastic wrap. Refrigerate for at least 2 hours.
After resting the dough, take it out of the refrigerator and preheat your oven to 350°F.
Place a sheet of parchment paper (the same length as your baking sheet) down on a work surface.
Place one of the disks of dough onto the parchment paper, dust the top with flour, and roll out to 1/8” thick.
Using a pizza cutter, cut the dough horizontally and vertically into rectangles of your desired size.
Using a fork, puncture each graham cracker 3 times down its length.
Whisk one egg and lightly brush the entire sheet of dough with the egg.
Sprinkle white sugar on top, then place the sheet of parchment paper onto a baking sheet and bake for about 10-12 minutes.
Repeat steps 10-15 for the second disk of dough and enjoy!
Wood-Fired Chocolate Beet Muffins (without the wood-fired oven)

Yes, you read that correctly. Wood-fired muffins: no wood-fired oven required. How is this possible, you ask? Another favorite secret ingredient of ours: liquid smoke. Save yourself the $10,000 wood-fired oven price tag and just pick up a $7 bottle of liquid smoke from the grocery store for the same effect and a total cost savings of $9,993.
Even though beets are the age-old most hated vegetable, nothing tastes quite like fall like these sweet, smoky, and earthy-flavored muffins. Plus, they have the added bonus of containing several vitamins and minerals, such as iron, potassium, manganese, and vitamins B9 and C. Time and again, chocolate and beets prove to be an unbeatable flavor combination, and they perfectly encapsulate some of autumn’s best flavors.
Ingredients:
2 cups (240 g) whole wheat flour
1/2 cup (50 g) cocoa powder
1 tbsp baking powder
1/2 tsp baking soda
2 tsp salt
2 large beets, shredded
1 1/2 cups (300 g) white sugar
1 stick melted butter
2 eggs
1 2/3 cup water
2 tbsp Stubb’s hickory liquid smoke
1 tbsp vanilla extract
desired amount of dark chocolate chips
Directions:
Preheat oven to 450°F and double-line a muffin pan with paper muffin cups.
Pro Tip: For best results, place muffin liners in every other space (i.e. in a V-formation). Doing so will allow the muffins to rise higher while baking.
Remove the top layer of the beets with a vegetable peeler and then rinse them under water. Lightly pat dry and use a flat coarse grater to shred. Lightly pat dry when done shredding.
In a large bowl, whisk together flour, cocoa powder, baking powder, baking soda, and salt.
In a separate bowl, combine sugar, melted butter, eggs, water, liquid smoke, and vanilla extract. Then, mix in dry ingredients until just combined.
Gently fold in shredded beets and chocolate chips until combined.
Fill each muffin cup to the top with batter and sprinkle light brown sugar on top.
Bake the muffins for five minutes at 450°F, then turn the oven to 350°F and bake for 15-20 more minutes.
Note: Decreasing the temperature allows the muffins to finish baking without burning.
That’s it for now! Happy baking!